I've always considered Arduino as sufficient, so why would I ever want to take on a new prototyping kit?
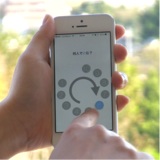
 |
| The standard Phidgets I/O board |
If Phigets can provide a faster development iteration loop, which I believe is the single most important thing in hardware development, that may be enough of a reason to switch over.
In this article, I will implement 3 standard hardware prototypes, and compare their implementation speeds using Phidgets and Arduino.
What is Phidgets?
The biggest different between Phidgets and other prototyping kits is that the Phidgets controller itself isn't programmable.Instead, you connect Phidgets (proprietary) sensors to the I/O board (pictured above), which connects to a PC. You can use high-level programming languages (Java/C++/etc) to directly control the sensors/actuators.
Some characteristics of Phidgets include:
Simplicity+Speed →No need to mess around with resistors and current calculations, just plug-in the components and you're ready to go.
Connectivity →You're working on your PC from the start, so I've found that connecting your newly made hardware to other programs/network is very simple.
(Really) expensive →You have to use the components provided by Phidgets to take advantage of the two points stated above. The components are modularized (to enable the plug-in capability), making them very expensive.
Speed Tests!
I compared Arduino and Phidgets by implementing 3 very simple prototypes:#1 Blink →Just blinking an LED
#2 Servos →Using a potentiometer to control a servo
#3 Pedometer →Using an accelerometer to count steps, and display it on an LED array
Here's a video showing the implementation, side-by-side:
#1 Blink
The LEDs are made to blink with 500ms period.
■Implementation details
Arduino source
Phidgets source
■Time to implement
Arduino: 1m 44s
Phidgets: 1m 11s
Not a complete landslide, but implementation with Phidgets was 30 seconds faster.
Arduino had the handicap of needing resistors on the LED, which Phidgets doesn't need.
However, the output pin on Phidgets needed a screw driver to fix, which was more work than I'd expect from a rapid prototyping kit...
■Cost
Arduino: $24(Arduino Uno)
Phidgets: $80(Phidgets Interface Kit 8/8/8)
Even the standard Phidgets board is very expensive.
#2 Servos
Here, we let users change the position of the servo by rotating the potentiometer.
■Implementation details
Arduino source
Phidgets source
On both of the implementations, we are receiving the potentiometer readings as analog input, converting it to angles, and sending it to the servo.
■Time to implement
Arduino: 6m 07s
Phidgets: 3m 20s
Phidgets took about half the time of Arduino.
Most of this is because Arduino couldn't power the servo, so I needed to add an external power supply.
In terms of software, the Phidgets Java SDK lets you write in an event-driven fashion which I personally like.
■Cost
Arduino: $37(Arduino Uno, Servo S03T, Potentiometer)
Phidgets: $139(Phidgets Interface Kit 8/8/8, Servo Controller, Servo, Rotary Encoder)
Adding sensors and switches really ups the cost of Phidgets prototyping.

■Implementation details
Arduino source
Phidgets source
I implemented a very simple high-pass filter. I calculate the power: sqrt(x^2+y^2+z^2), determine its moving average, subtract it from the power, and detect zero-crossings of the high-passed power.
■Time to implement
Arduino: 13m 45s
Phidgets: 10m 15s
Implementing the walking detection was considerably faster on Phidgets, but adding the LED array took very long, resulting in a very dull result.
(Without the LED array, it only took 4 minutes to implement a pedometer on Phidgets.)
While I only needed to plug the accelerometer into the USB port in Phidgets, I had to Google the pin layouts of the accelerometer module for Arduino.
On the software side, the strength of being able to program using a high-level programming language on Phidgets really showed.
I was able to use various (self-made) utility libraries to speed up the implementation:
a moving average calculator class which makes calculating moving averages a one-liner,
a graph drawing toolkit that let me visualize and debug the accelerometer output
The time spent programming was a clear win for Phidgets: (Phidgets: 3 mins Arduino: 6 mins)
■Cost
Arduino: $31(Arduino Uno, Accelerometer)
Phidgets: $150(Phidgets Interface Kit 8/8/8, PhidgetSpatial 3/3/3 Sensor)
Just to press home the point, Phidgets is expensive.
There were some (good and bad) characteristics of Phidgets that were made apparent in the tests:
1. Very fast hardware construction
As long as we stay in the realm of what Phidgets provide as modular components, prototyping hardware in Phidgets is very fast.
2. Lets you use various software resources
In the third test, I was struck by how enabling it is to be able to use the various Java utility libraries that I'd accumulated over time, in a hardware prototyping setting.
Phidgets makes hardware prototyping as easy as writing quick and dirty scripts on your PC.
3. No knowledge of electronics needed
As far as I've played around with (which isn't much), Phidgets seems to let you prototype hardware with very limited knowledge of electronics. This may be very beneficial for programmers who have no experience in hardware.
1. Difficult to build stand-alone gadgets
Phidgets needs to be controlled by a PC, which means that its difficult to build portable/wearable devices.
2. Not simple enough
Why do I need a screw driver on a prototyping board?
I don't think the designers really thought what it means to do rapid prototyping.
The fact that I need to use a breadboard for a simple task as making an LED array (in task #3) is disappointing.
People should be able to prototype with their bare hands. (no screw drivers, no breadboards, no jumpers)
3. Doesn't scale
The good thing about Arduino is that the more you improve your prototype, the closer you get to a product.
With Phidgets, at some point you will need to redesign your hardware, and convert everything you made into "proper" electronics (which won't be a problem if you're happy with only having one copy of your hardware.)
4. Expensive
In the tests above, the prototypes using Phidgets was 3~5 times as expensive as Arduino.
This means that people can't really buy a new Phidgets board for each project, so you need to take everything apart before you start a new project.
The use cases for which this is OK is fairly limited (discussed below).
・Have a set in your meeting room/brainstorming room
Why not have a Phidgets set lying around in your meeting room?
The speed at which Phidgets lets you create prototypes means that you can probably make prototypes in the middle of a brainstorming session.
This would be a fantastic alternative to drawing pictures or building mocks with LEGOs,
and the downsides of Phidgets portrayed above aren't so critical if the prototypes only need to last for 20 minutes.
(I would like point (2) above to be fixed before I buy a set for my meeting room though...)
・When every second counts
There are times when you need to build a working prototype as fast as is conceivably possible, like in a hackathon, or if you need to show your boss that the idea he's about to present to the board in an hour just doesn't work. (it's happenned.)
It may be good to have these things lying around as part of your arsenal.
・If you're a programmer who's intent on not learning electronics
I think it's great as a communication tool for programmers who have no skill (or intent on learning) electronics to show their ideas to hardware developers in the team, who may happily implement it on a more robust platform.
I would say that for someone who just wants to start learning electronics now (including children), I'd suggest something else (e.g Arduino). However, the various characteristics of Phidgets do make them fabulous for certain situations.
If you want to play around with Phidgets, try buying the two kits below:
Phidgets Interface Kit 8/8/8 →standard I/O board for connecting the sensors to your PC
Phidgets Starter Kit #1 →kit containing various Phidgets compliant sensors.
Adding sensors and switches really ups the cost of Phidgets prototyping.
#3 Pedometer
Here, we use an accelerometer to detect walking, and count the footsteps which we display on an LED array.■Implementation details
Arduino source
Phidgets source
I implemented a very simple high-pass filter. I calculate the power: sqrt(x^2+y^2+z^2), determine its moving average, subtract it from the power, and detect zero-crossings of the high-passed power.
■Time to implement
Arduino: 13m 45s
Phidgets: 10m 15s
Implementing the walking detection was considerably faster on Phidgets, but adding the LED array took very long, resulting in a very dull result.
(Without the LED array, it only took 4 minutes to implement a pedometer on Phidgets.)
While I only needed to plug the accelerometer into the USB port in Phidgets, I had to Google the pin layouts of the accelerometer module for Arduino.
On the software side, the strength of being able to program using a high-level programming language on Phidgets really showed.
I was able to use various (self-made) utility libraries to speed up the implementation:
a moving average calculator class which makes calculating moving averages a one-liner,
a graph drawing toolkit that let me visualize and debug the accelerometer output
The time spent programming was a clear win for Phidgets: (Phidgets: 3 mins Arduino: 6 mins)
■Cost
Arduino: $31(Arduino Uno, Accelerometer)
Phidgets: $150(Phidgets Interface Kit 8/8/8, PhidgetSpatial 3/3/3 Sensor)
Just to press home the point, Phidgets is expensive.
Results
Just looking at the implementation speed, Phidgets was faster on all 3 tests.There were some (good and bad) characteristics of Phidgets that were made apparent in the tests:
■Good things about Phidgets
1. Very fast hardware construction
As long as we stay in the realm of what Phidgets provide as modular components, prototyping hardware in Phidgets is very fast.
2. Lets you use various software resources
In the third test, I was struck by how enabling it is to be able to use the various Java utility libraries that I'd accumulated over time, in a hardware prototyping setting.
Phidgets makes hardware prototyping as easy as writing quick and dirty scripts on your PC.
3. No knowledge of electronics needed
As far as I've played around with (which isn't much), Phidgets seems to let you prototype hardware with very limited knowledge of electronics. This may be very beneficial for programmers who have no experience in hardware.
■Bad things about Phidgets
1. Difficult to build stand-alone gadgets
Phidgets needs to be controlled by a PC, which means that its difficult to build portable/wearable devices.
2. Not simple enough
Why do I need a screw driver on a prototyping board?
I don't think the designers really thought what it means to do rapid prototyping.
The fact that I need to use a breadboard for a simple task as making an LED array (in task #3) is disappointing.
People should be able to prototype with their bare hands. (no screw drivers, no breadboards, no jumpers)
3. Doesn't scale
The good thing about Arduino is that the more you improve your prototype, the closer you get to a product.
With Phidgets, at some point you will need to redesign your hardware, and convert everything you made into "proper" electronics (which won't be a problem if you're happy with only having one copy of your hardware.)
4. Expensive
In the tests above, the prototypes using Phidgets was 3~5 times as expensive as Arduino.
This means that people can't really buy a new Phidgets board for each project, so you need to take everything apart before you start a new project.
The use cases for which this is OK is fairly limited (discussed below).
Summary
There are several situations where I thought using Phidgets would be perfect.・Have a set in your meeting room/brainstorming room
Why not have a Phidgets set lying around in your meeting room?
The speed at which Phidgets lets you create prototypes means that you can probably make prototypes in the middle of a brainstorming session.
This would be a fantastic alternative to drawing pictures or building mocks with LEGOs,
and the downsides of Phidgets portrayed above aren't so critical if the prototypes only need to last for 20 minutes.
(I would like point (2) above to be fixed before I buy a set for my meeting room though...)
・When every second counts
There are times when you need to build a working prototype as fast as is conceivably possible, like in a hackathon, or if you need to show your boss that the idea he's about to present to the board in an hour just doesn't work. (it's happenned.)
It may be good to have these things lying around as part of your arsenal.
・If you're a programmer who's intent on not learning electronics
I think it's great as a communication tool for programmers who have no skill (or intent on learning) electronics to show their ideas to hardware developers in the team, who may happily implement it on a more robust platform.
I would say that for someone who just wants to start learning electronics now (including children), I'd suggest something else (e.g Arduino). However, the various characteristics of Phidgets do make them fabulous for certain situations.
If you want to play around with Phidgets, try buying the two kits below:
Phidgets Interface Kit 8/8/8 →standard I/O board for connecting the sensors to your PC
Phidgets Starter Kit #1 →kit containing various Phidgets compliant sensors.